No products in the cart.
Panorama
Low-Tech Adventure by Hand and Eye
Story and Photos by Les Tanner
As I focused my camera on the scene spread out before us, I said to Bill, “This is really a waste of film, you know.”
“Why do you say that?”
“It’ll just be a snapshot. My photos always turn out that way.”
“That’s because the camera doesn’t see what you see.”
“Sure it does.”
“Not so. It just sees the center of what you are looking at, but you see things all across the horizon, as well as things at the periphery of your vision, even though you may not be conscious of them.”
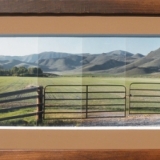
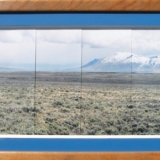
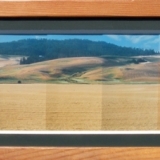
Silver Creek Valley, near Picabo.
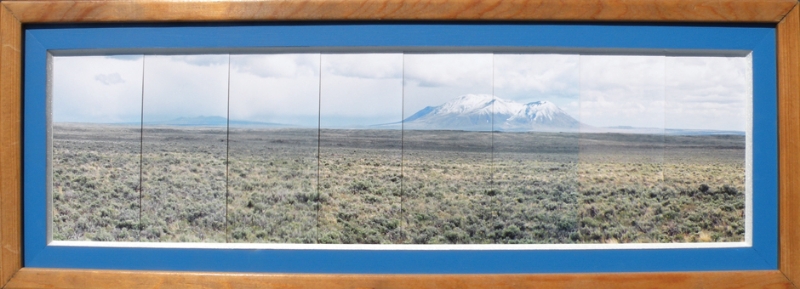
Big Southern Butte, south of Arco.
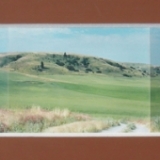
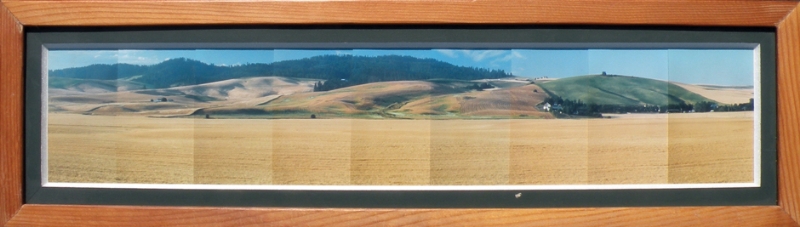
Paradise Ridge, south of Moscow.
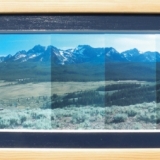
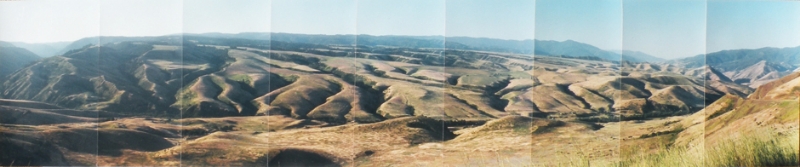
Sawtooth Mountains, near Stanley.

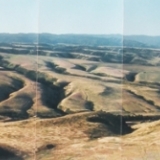
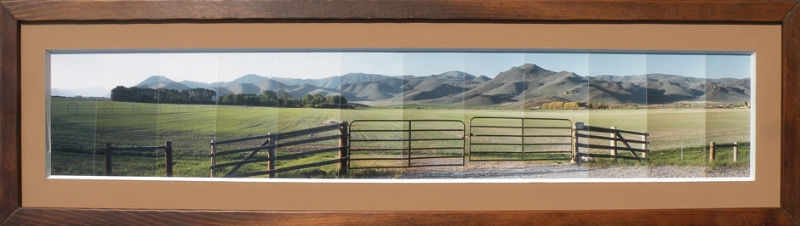
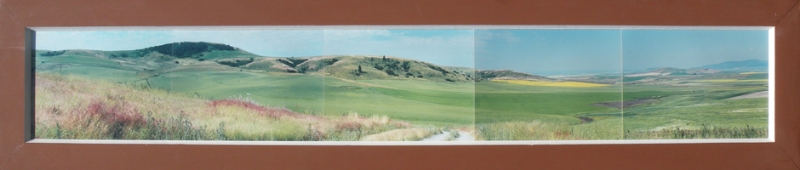
The northern Camas Prairie, northeast of Cottonwood.
White Bird Battlefield from U.S. Highway 95.
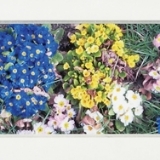
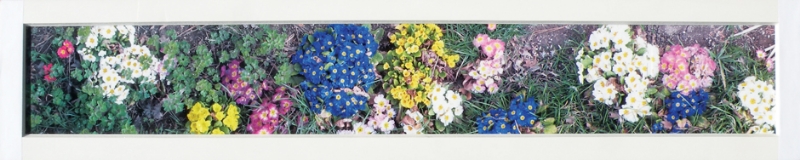
Panoramas need not be of distant objects, as these primroses attest.
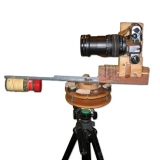
The author's assembled equipment for his "Tanner-amas."
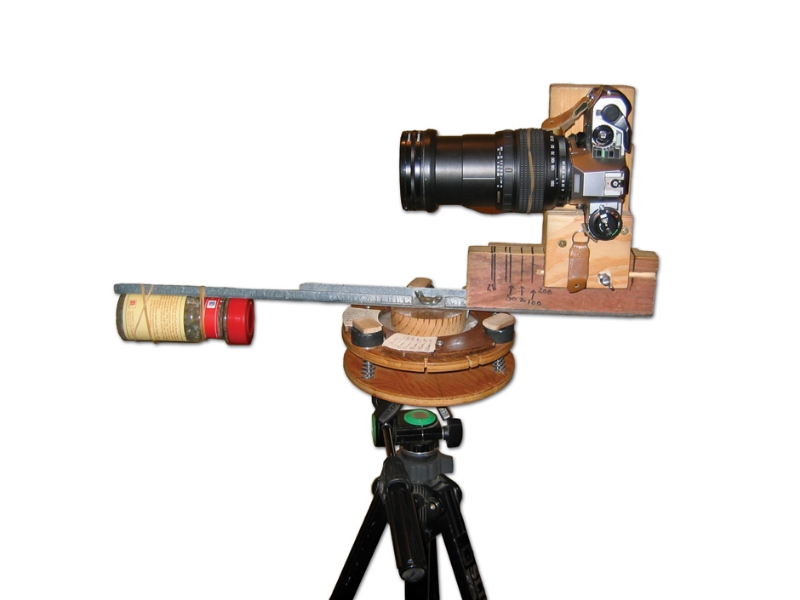
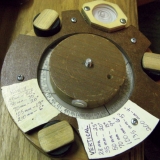
A device for leveling and rotating the camera at fixed degrees between frames.

That conversation took place on one of the many fishing trips I took with my friend and colleague, Bill Wallace, back in the early ‘80s. As I had predicted, what I got back from the photo shop was nowhere near what I hoped I was capturing on film. I thought no more about it until I visited the Smylie Archives at The College of Idaho many years later and saw some of the panoramas that had been taken in the early part of the century by William Judson Boone, the founder and first president of the college.
Dr. Boone had used a special camera designed to take his panoramic photographs, which were mainly shots of the college’s student body and faculty, lined up on the lawn near Sterry Hall. But Jan Boles, the college’s archivist, had begun experimenting with making such photos with a regular camera, one frame at a time, and joining the frames together. And Jan’s were of scenery, not students. He told me not long ago that the first significant photos he’d ever been able to take of the Owyhees were panoramas. He, too, had realized what Bill had told me.
Of course, I had to give it a try. I already had the basic equipment, a camera and a tripod, and the basic idea: take a bunch of pictures, rotating the camera a bit after each shot, mount the developed photos next to each other on a backing of some sort, and voila! Piece of cake. What could go wrong?
My first effort worked out almost perfectly, but it was pure luck. I didn’t even have to trim any of the photos. I’d just guessed at how much to rotate the camera. After that, I tried to get “scientific” about the project by calculating the exact angles of rotation needed for photos of objects taken at different camera settings. As you might expect, it took a lot of trial and error before I finally began to get respectable panoramas. So much for the scientific approach.
I won’t go into detail, but I did learn three important things. Because of the way ordinary camera lenses are made, adjacent photos should overlap about one-third of their width. Putting the camera in “auto” mode is not good, because as the camera is rotated, exposure settings can change, leading to adjacent light and dark frames. And one must take note of possible movement within the camera’s field of vision. Once, I accidentally created a five-truck convoy from a single truck that was traveling down a North Dakota highway in the same direction that I was rotating the camera.
All my panoramas have been made using the technique of abutting individual frames. At first it was done out of necessity, but I still do it that way, in spite of the availability of sophisticated digital cameras and computer software. One reason is that such equipment is expensive. Also, it’s fun to do real hands-on things now and then. Most important, however, is I’ve found that handling the individual photos of a panorama allows me to see single portions of the entire scene, many of which are interesting shots on their own.
I’ve tried using digital cameras and “stitching” software, but have never been satisfied with the results. I suppose if I were to purchase sophisticated stuff, I might have better results, but that’s not likely to happen. I also admit to using a digital camera to take the frame-at-a-time photos for some of my panoramas. I print these out on photo-quality paper using a nice color printer—okay, I’m not entirely a cheapskate—cut out the individual frames, and put them together the old way. Besides the advantages already described, this method has the advantage of allowing me to make multiple copies of a single panorama, as well as to make panoramas of various sizes.
—–
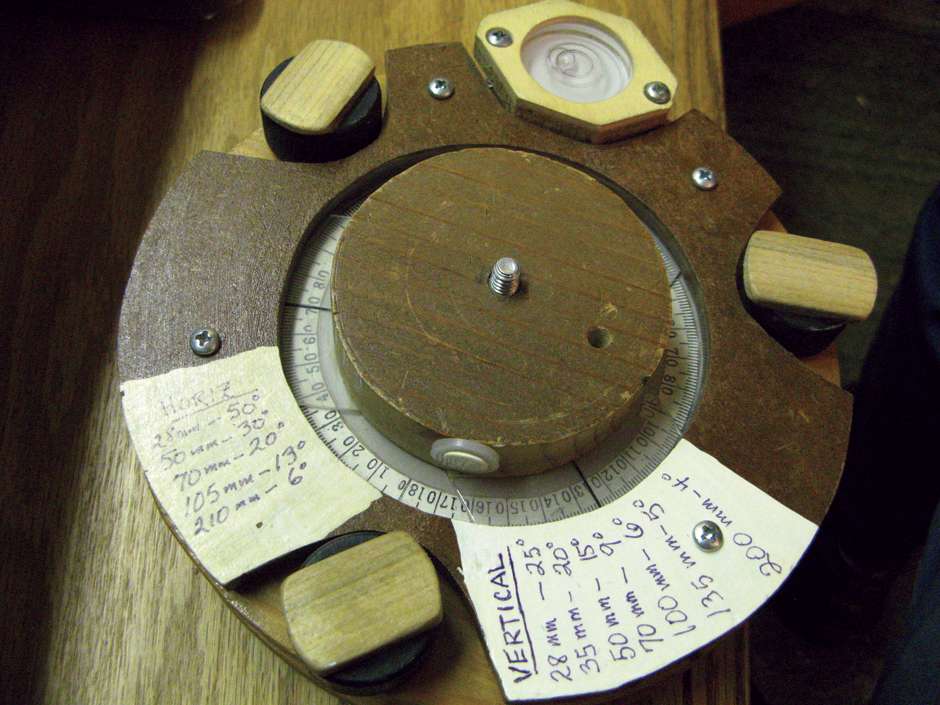
How to Make a “Tanner-ama”
Adjacent frames of a panorama must overlap to some extent. However, taking shots that overlap properly using just a camera and tripod didn’t work well for me, so I made a gadget, with plywood, bolts and springs, a paper photocopy of a 360-degree protractor, and a bulls-eye level. This device allows me to level the camera and rotate it a fixed number of degrees between frames. The amount of rotation depends on both the focal length and the orientation of the camera (landscape or portrait). By trial and error, I determined how much to rotate the camera to get the desired overlap of individual photos, and wrote that information on top of the gadget for easy access. Two other things proved necessary: a cable release and a device to hold the camera in portrait position (which gives better results than landscape orientation but requires more frames). I bought the first, manufactured the second.
Again by trial and error, I discovered that a rhythm was necessary: snap the photo, advance the film, rotate the camera, repeat. When those movements were done out of order, I got odd results—or none. Finally, I learned not to rely on the “auto” setting of my camera. In manual mode, I adjusted the camera’s settings for what would become the middle of the panorama, and then started filming, usually from left to right, using the “snap, advance, rotate” routine.
This content is available for purchase. Please select from available options.
Purchase Only
Purchase Only
